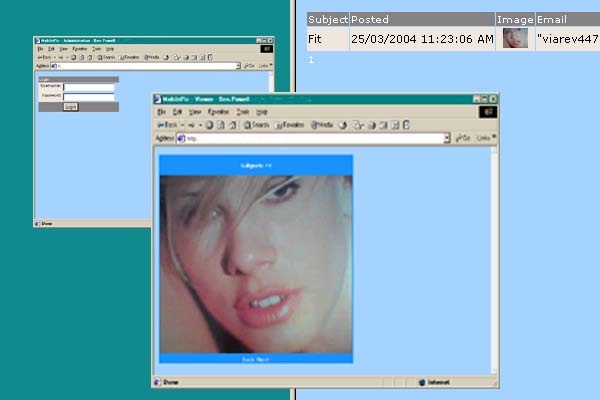
Introduction
With the advent of the camera appearing on mobile (cellular) phones, a whole new world has now appeared. Mobile Blogging or “Mobblogging” services are offered by a variety of websites now, and I’m going to show you how this technology works. To get this sample to work you’ll need to download and install the POP3 mail component from DevMail.net. Don’t worry because they offer a free version that only downloads the first 50kb of the attachment. This isn’t going to matter to us for the moment, because you can set most phones to a lower resolution. To be honest, most phones won’t produce JPEG files over 50kb anyway.

The DevMail.Net component allows you to connect to POP3 mailboxes and process mail items that it finds there. If your mobile phone is MMS enabled then it can send MMS picture messages via your mobile provider, through a gateway and onto the internet as an email with an attachment. (You’ll need to check your phone for this feature.)
This demonstration application comes in three sections:
- The front end viewer
- The back end administration
- The POP3 pickup
Historical Note
Update: Feb 2025
I noticed this old post as I was moving to Astro. I’ve realized that I essentially invented Instagram in 2003. ;-)
Background
MMS or Multimedia Messaging Service is a mobile technology built upon the basics of the GSM Short Message System (SMS). MMS is pre-3G and works by using GPRS to transport the message. MMS can incorporate a number of formats including images, sound and video as well as text, but for this demonstration we will just be using JPEG images. To find out more about MMS and how it works, visit the MobileMMS FAQ.
The Database
The data for your Mobile Picture library will be stored using XML. The application is designed so that an XML schema defines the format of the XML, and if no previous entries have been made (and no XML exists) then the application will create the XML data store based on the schema definition. The schema that defines a Mobile Picture Post is as follows:
<?xml version="1.0" encoding="utf-8" ?>
<xs:schema id="MobilePix" xmlns=""
  xmlns:xs="http://www.w3.org/2001/XMLSchema"
  xmlns:msdata="urn:schemas-microsoft-com:xml-msdata">
  <xs:element name="MobilePix" msdata:IsDataSet="true"
    msdata:Locale="en-us">
    <xs:complexType>
      <xs:choice maxOccurs="unbounded">
        <xs:element name="picentry">
          <xs:complexType>
            <xs:sequence>
              <xs:element name="id" type="xs:string" minOccurs="0" />
              <xs:element name="picTime" type="xs:date" minOccurs="0" />
              <xs:element name="picSubject" type="xs:string" minOccurs="0" />
              <xs:element name="picImage" type="xs:string" minOccurs="0" />
              <xs:element name="picEmail" type="xs:string" minOccurs="0" />
            </xs:sequence>
          </xs:complexType>
        </xs:element>
      </xs:choice>
    </xs:complexType>
  </xs:element>
</xs:schema>
The POP3 integration
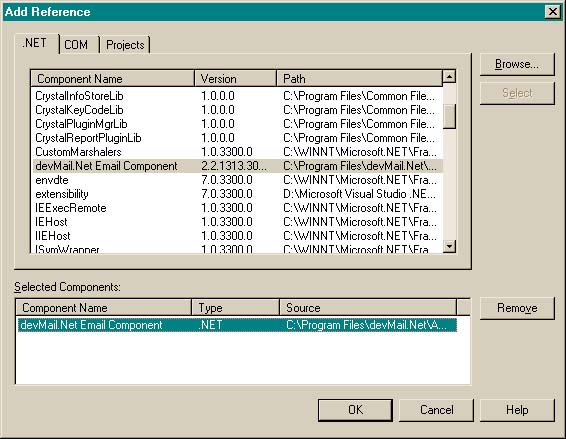
To process POP3 mail messages we are going to use DevMail.Net’s POP3 component. This component is simple to use, and allows us to loop through the stored mail messages and process attachments if we find them. You first need to include the reference to this object and you do that in Visual Studio by clicking on “Project” -> “Add Reference”. (See screenshot).

Once you have this in, you can reference the library in your code-behind page easily:
using devBiz.Net.Mail;
Now we can process the mailbox messages. First we create an instance of the POP3 Inbox object and set the username, password and mailhost properties:

POP3 o_Inbox = new POP3();
string s_Folder;
int i_NumMessages;
o_Inbox.Username = ConfigurationSettings.AppSettings["pop3_Username"];
o_Inbox.Password = ConfigurationSettings.AppSettings["pop3_Password"];
o_Inbox.Host = ConfigurationSettings.AppSettings["pop3_Server"];
The configuration options are set neatly in the web.config file, which allows you to easily set up your installation, with the minimum of fuss.
The following section checks whether the component is connected to the mailbox and then loops through each message:
if (o_Inbox.Connect())
{
  Response.Write("Connected at " + DateTime.Now + "\n");
  s_Folder = Server.MapPath("photos/");
  i_NumMessages = o_Inbox.NumberOfMessages;
  foreach (MailMessage o_Msg in o_Inbox)
  {
   ....
   ....
  }
Now we are looping through each mail message we need to cycle through each attachment available. There should only just be one, but doing it this way neatly guarantees that if there are none or more than one, all bases are covered. You also need to give each image a unique file name. To do this we use the .NET GUID.NewGuid() function, and tag on a “.jpg”. In this way you can guarantee each file name is unique. Finally we add the picture post data to the XML data file and delete the mail message from the mail server.
foreach (Attachment o_Att in o_Msg.Attachments)
{
 string s_GUID = Guid.NewGuid().ToString();
 string s_File = s_GUID + ".jpg";
 o_Att.SaveToFile(s_Folder + s_File);

 MobilePix.AddPicturePost(o_Msg.Subject.ToString(),
   "photos/" + s_File, o_Msg.From.ToString());
}
o_Msg.Delete(false);
Each of the emailed photos should now be saved to your “photos” directory. Adding the picture post to your XML file is a relatively simple process. I have put this function, as well as other functions that help us manage the XML data in our own class file called “MobilePix”.
The MobilePix Class
The MobilePix class contains three “helper” functions that you could say define the business logic of the application. They provide access to listing the XML records, adding new XML records and deleting old XML records.
Retrieving the XML DataSet
The XML data file is cached by the application in the HttpContext.Current.Cache. It neatly works by trying to to open the XML file based on the schema. If it doesn’t find the XML file then it creates it based on the schema. A dataset is returned to the callee function.
public static DataSet GetDS()
{
    DataSet ds = (DataSet)HttpContext.Current.Cache["MobilePix"];
    if (ds == null)
    {
        // reload the dataset from the XML data
        ds = new DataSet("MobilePix");
        ds.ReadXmlSchema(ConfigurationSettings.AppSettings["xmlSchema"]);
        try
        {
            ds.ReadXml(ConfigurationSettings.AppSettings["xmlFile"]);
        }
        catch
        {
        // nothing
        }
        HttpContext.Current.Cache.Insert("MobilePix", ds, null,
        DateTime.Now.AddHours(1), TimeSpan.Zero);
    }
    return ds;
}
Adding a new Picture Post
Adding a new Picture Post is also simple. You first get the existing DataSet table. Once you have that you create a new row, and then add that new row to the DataSet table. Once the process is complete you write the XML file to disk.
DataSet dsPosts = GetDS();
DataRow dr;dr = dsPosts.Tables[0].NewRow();
dr["id"] = Guid.NewGuid().ToString();
dr["picSubject"] = picSubject;
dr["picTime"] = DateTime.Now.ToString();
dr["picImage"] = picImage;
dr["picEmail"] = picEmail;
dsPosts.Tables[0].Rows.InsertAt(dr, 0);
dsPosts.WriteXml(ConfigurationSettings.AppSettings["xmlFile"]);
Deleting a Picture Post
Deleting a picture post is a little bit more difficult than adding based on the fact that you need to define a primary key field before you can find a DataRow in a DataTable. The following defines a DataColumn as the tables Primary Key, and then deletes the located row from the DataTable.
DataSet dsPosts = GetDS();
DataColumn[] pk = new DataColumn[1];
pk[0] = dsPosts.Tables[0].Columns["id"];
dsPosts.Tables[0].PrimaryKey = pk;
DataRow dr = dsPosts.Tables[0].Rows.Find(picID);
dr.Delete();
dsPosts.AcceptChanges();
dsPosts.WriteXml(ConfigurationSettings.AppSettings["xmlFile"]);
Administrating Posts Securely
The Administration is secured so that a single administrator is able to login and list all posts. From there the administrator can delete posts that they no longer require. The administration is split into two separate ASP:Panels; the Login panel and the Picture Post Listing panel.
Again the administration username and password are stored neatly in the web.config, and the user’s login data is validated against this. Once successfully logged in the list of picture posts is displayed. The DataGrid is neatly paged and demonstrates a variety of DataGrid techniques available to us as ASP.NET programmers, including the use of:
- OnItemCreated: Create JavaScript confirm dialogues which activate when deleting a picture post
- an ItemCommand: Used when you want to delete picture posts
- Simple Paging: Used to effectively present the list of existing picture posts
Displaying the Images
The main index.aspx page displays the posted / extracted photos using a DataGrid set with a a page size of 1. This allows you to page through each of your posts. To connect the DataGrid to the data you simply point the DataGrid’s datasource to the XML file dataset:
public void Data_Load()
{
 DataSet ds = MobilePix.GetDS();
 dg_Posts1.DataSource = ds.Tables[0].DefaultView;
 dg_Posts1.DataBind();
}
Setting up the Web.Config
The web.config file stores the settings for this project, and mean that you only need to set these variables in one single place, and not make changes throughout your project. These setting are stored within the Configuration.AppSettings like so:
<appSettings>
<add key="xmlFile" value="c:\inetpub\wwwroot\MobilePix\MobilePix.xml"/>
<add key="xmlSchema" value="c:\inetpub\wwwroot\MobilePix\MobilePix.xsd"/>

<add key="culture" value="en-us"/>
<add key="username" value="Admin"/>
<add key="password" value="Password"/>


<add key="pop3_Username" value="[email protected]"/>
<add key="pop3_Password" value="pop3pass"/>
<add key="pop3_Server" value="mail.myhost.com"/>

</appSettings>
You will need to change your settings to match those of your application. Specifically make sure that your XML and XSL file locations are correct, plus those settings for the POP3 server, otherwise the PickUp.aspx script isn’t going to work.
Scheduling the Mailbox Pickup
Finally, wouldn’t it be neat to have the pickup script run once an hour? It would wouldn’t it, but as far as I can make out ASP.NET doesn’t provide any method for scheduling. If you have access to a dedicated server then you could build this pickup script as a windows service fairly easily. There are plenty of examples of how to do so on CodeProject. The way I have done this is to use a LINUX server as it is much easier to get scheduled tasks set up under LINUX. Using a PHP script that is executed hourly (see CRON), I can call my mail pickup script with ease, and without the Windows hassle. The PHP code to do this (and email me a report) is below:
<?php
## What:  call to pickup.aspx
## Date:  24th March 2004
## How:  Screenscape and eval result
##   Email if result is not 0 messages
$url = "http://www.yourwebsite.com/MobilePix/pickup.aspx";
$myinfo = implode(" ", file($url));

echo $myinfo;
## echo substr_count($myinfo, "Total 0 messages downloaded.");
if ( substr_count($myinfo, "Total 0 messages downloaded.") == 0) {
 $to = "[email protected]";
 $from_header = "From: Extractor Scheduler";
 mail($to, "Mail Report", $myinfo, $from_header);
}
?>
Summary
That will hopefully show you how to extract Mobile Camera Phone images to your website. It is really just a method of extracting email attachments, but integrated with your camera phone indirectly, it is now a neat method of happily snapping photos of your friends and family all day and posting them to your website as a historical record.
Have fun, and enjoy.
N.B. I must also give a thanks to Johan Danforth, who originally posted a Blog code in VB.NET, from which some of the XML / XSD concepts are based upon (although translated into C#). Johan’s original code is posted on CodeProject here: http://www.codeproject.com/soap/weblog.asp