Introduction
In this post, we’ll walk through the process of creating a .NET Aspire Hosting Extension for webhook testing, publishing it as a NuGet package, and integrating it into an Aspire app. We’ll use the Aspire.Hosting.WebhookTester repository as our reference implementation.
Step 1: Identifying and Analyzing the Docker Image
For this extension, we use the tarampampam/webhook-tester Docker image, pulled from the GitHub Container Registry (ghcr.io). The default tag is 2, but you can pin to a specific version if needed.
Image details:
- Registry:
ghcr.io - Image:
tarampampam/webhook-tester - Tag:
2
Supported environment variables:
DEFAULT_SESSION_TOKEN: Sets the default session token for the webhook endpoint.HTTP_PORT: Sets the HTTP listen port (default: 8080).AUTO_CREATE_SESSIONS: Enables auto-creation of sessions (default: true).LOG_LEVEL,LOG_FORMAT: Control logging verbosity and format.SERVER_ADDR: Set the server listen address.HTTP_READ_TIMEOUT,HTTP_WRITE_TIMEOUT,HTTP_IDLE_TIMEOUT,SHUTDOWN_TIMEOUT: Control server timeouts.STORAGE_DRIVER,FS_STORAGE_DIR: Configure storage backend and directory.PUBSUB_DRIVER,REDIS_DSN: Configure pub/sub backend and Redis connection.TUNNEL_DRIVER,NGROK_AUTHTOKEN: Enable ngrok tunneling and set auth token.SESSION_TTL,MAX_REQUESTS,MAX_REQUEST_BODY_SIZE: Control session and request limits.
Step 2: Creating the .NET Aspire Hosting Extension
The extension defines a WebhookTesterResource class, which configures the container using the image, tag, and environment variables above. Fluent builder extensions allow you to customize all supported options.
Example usage:
builder.AddWebhookTester(
    name: "webhook",
    token: "your-session-token",
    autoCreateSessions: true,
    port: 8080)
    .WithLogLevel(LogLevel.Info)
    .WithLogFormat(LogFormat.Json)
    .WithStorageDriver(StorageDriver.Memory)
    .WithPubSubDriver(PubSubDriver.Memory);
Step 3: Building and Publishing to NuGet
Publishing is automated via GitHub Actions. The workflow builds, packs, and pushes the NuGet package to nuget.org using a secret API key. See the repo’s .github/workflows/publish.yml for details.
Step 4: Using the Extension in an Aspire App
Using the Sample
- The
/samplefolder in the repo contains a ready-to-run Aspire app demonstrating the extension. - Review the sample for usage patterns and integration tips.
Creating a New Aspire App and Integrating the Extension
- Create a new Aspire app:
dotnet new aspire-app -n WebhookAspireSample cd WebhookAspireSample/WebhookAspireSample.ApiService - Add the NuGet package:
dotnet add package Allesa.Aspire.Hosting.WebhookTester - Configure the extension in your app:
- In your
Program.csorStartup.cs, add:
builder.AddWebhookTester("webhook", "your-session-token");- Use the builder extensions to customize environment variables as needed.
- In your
- Trigger a webhook from your API:
- In your weather forecast endpoint, add code to send a webhook to the tester container whenever the endpoint is called.
Example:
[HttpGet("weather-forecast")]
public IActionResult GetWeatherForecast()
{
    // ...existing code...
    // Send webhook
    var client = new HttpClient();
    client.PostAsync("http://localhost:8080/s/your-session-token", new StringContent("{ 'event': 'forecast-called' }", Encoding.UTF8, "application/json"));
    // ...existing code...
}- Run the app and test:
- Start the Aspire app and call the weather forecast endpoint.
- Check the webhook tester UI to see the received webhook.
Example: Adding the Hosting Extension to AppHost
var webhook = builder.AddWebhookTester("webhook-tester")
    .WithLogLevel(LogLevel.Debug);

var apiService = builder.AddProject<Projects.AspireApp1_ApiService>("apiservice")
    .WithHttpHealthCheck("/health")
    .WithReference(webhook)
    .WithDefaultWebhookToken(webhook)
    .WaitFor(webhook);
Example: Using the Webhook Tester in the API
app.MapGet("/weatherforecast", async ([FromServices] IHttpClientFactory httpClientFactory) =>
{
    var forecast = Enumerable.Range(1, 5).Select(index =>
            new WeatherForecast
            (
                DateOnly.FromDateTime(DateTime.Now.AddDays(index)),
                Random.Shared.Next(-20, 55),
                summaries[Random.Shared.Next(summaries.Length)]
            ))
        .ToArray();

    var httpClient = httpClientFactory.CreateClient("webhook-tester");

    var response = await httpClient.PostAsJsonAsync($"/{builder.Configuration[\"DEFAULT_SESSION_TOKEN\"]}", new
    {
        test = "bob"
    });
    response.EnsureSuccessStatusCode();

    return forecast;
})
.WithName("GetWeatherForecast");
Screenshots
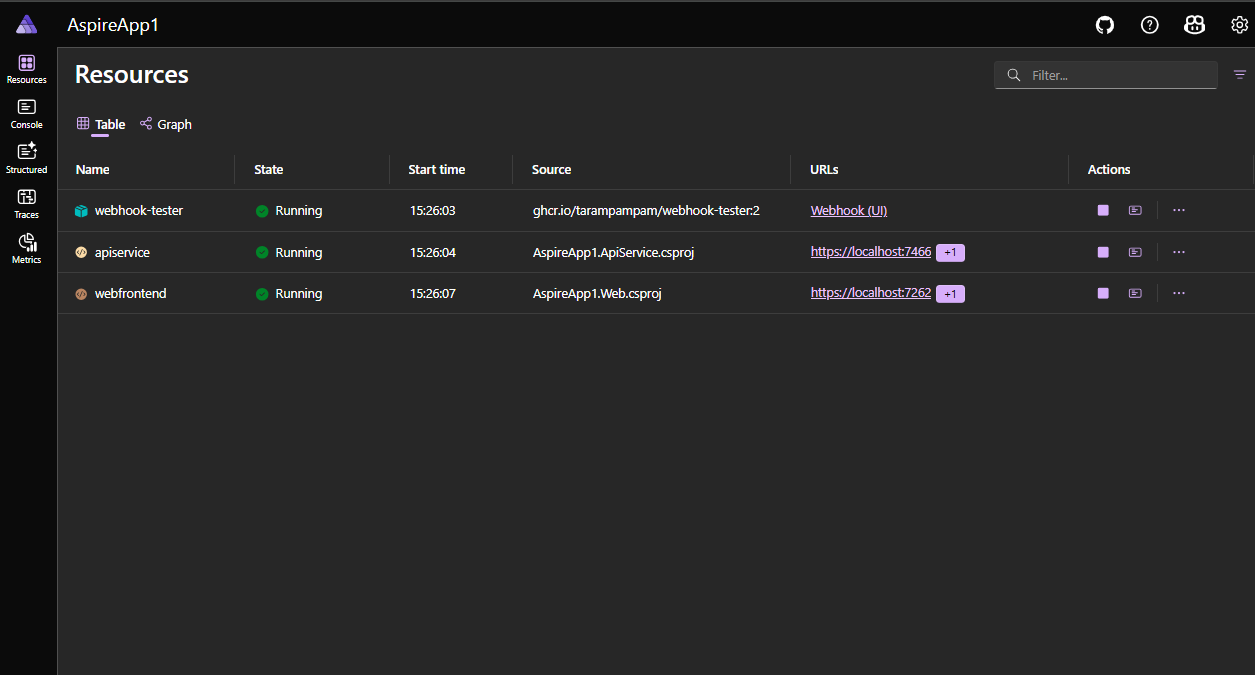
Once running you’ll see the container running under the Aspire Dashboard. Note, you’ll need to run Docker support via Docker Desktop or Podman (or whatever your poison).
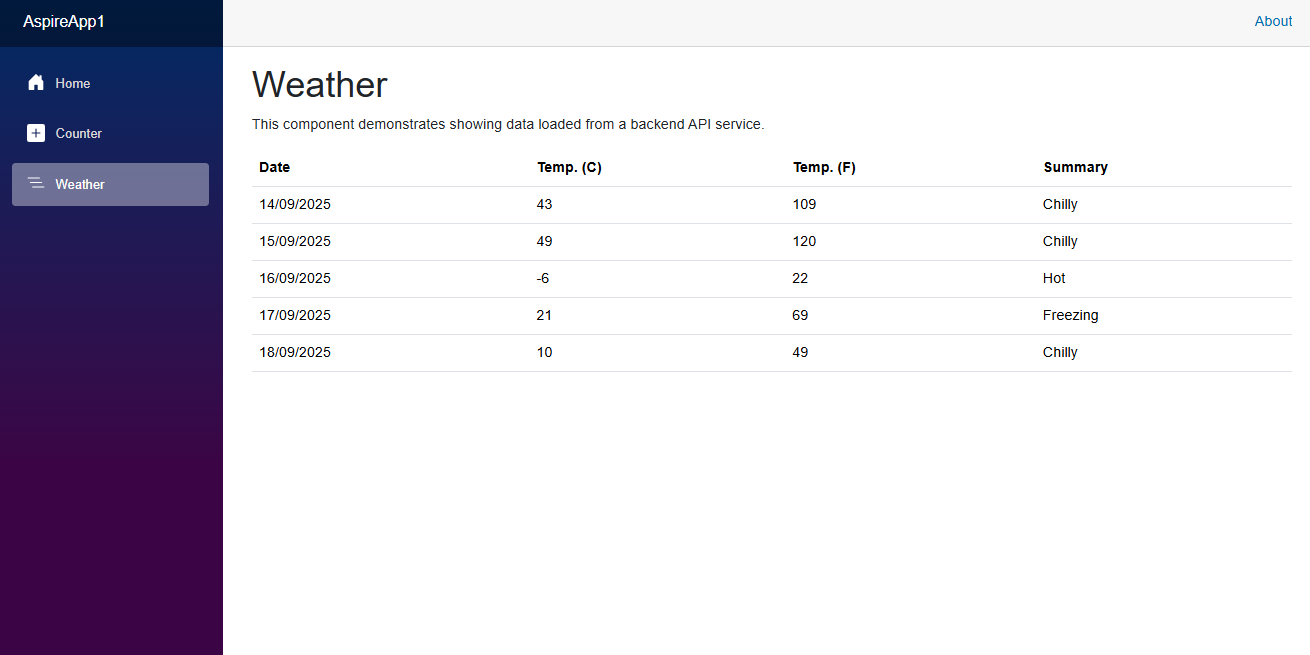
Once you open the Aspire sample app web interface and switch to the weather view, this makes a request to the API endpoint for data.
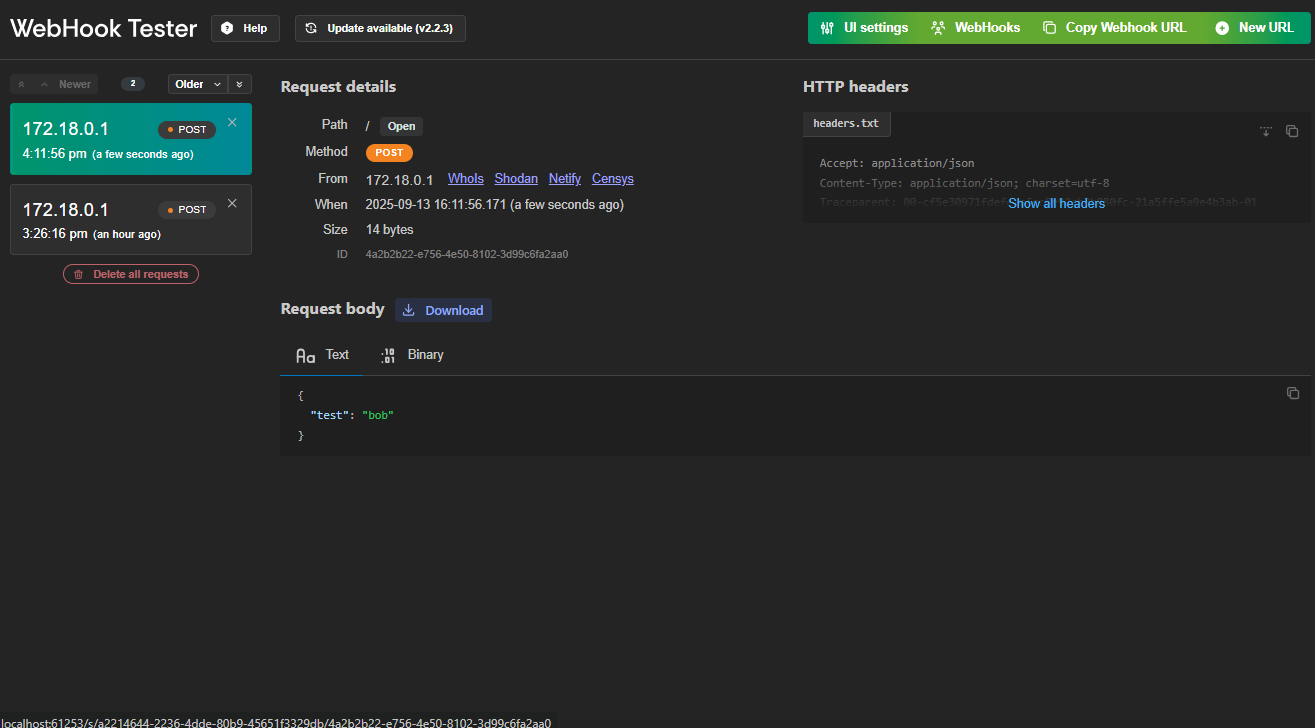
This then triggers the webhook callback to our webshooks tester interface, where whilst running, you can track all webhooks that get sent in a nice UI.
Conclusion
By following these steps, you can create, publish, and use a .NET Aspire Hosting Extension for webhook testing. This workflow streamlines integration testing and makes it easy to observe webhook events in your distributed applications.
For more details, see the Aspire.Hosting.WebhookTester GitHub repo.