Background
I recently wrote about moving away from WordPress and DigitalOcean, but I still want to have the option to deploy my web applications to my own VPS. I’m also interested in moving off DigitalOcean and moving to a European alternative. Enter Hetzner, based in Germany.
Old Setup
For a number of years, I ran a VPS on DigitalOcean using WebMin / VirtualMin. It ran for around ten years without any major issues, but it got to the point where it got stuck on a really old version of Ubuntu and it badly needed to be rebuilt. I then tried out the “free” 1-click Plesk deployment, which was licensed for 3 domains (narrator: until Plesk changed the licensing model), and now here we are with the updated personal website running for free on Cloudflare Pages.
Choosing a Self-Hosted PaaS
While I work in Azure at work, I want to try out some alternatives that aren’t big US tech. I have a few options for running .NET if I simply use Docker containers and deploy them:
I am a bit of a sucker for a UI for this kind of thing, and although I could probably settle with pure GitOps, Coolify has a pretty good UI, so I’ll go with that. It also has a bunch of standard applications you can 1-click deploy, from Postgres to Keycloak to Grafana. That’s pretty cool.
Installing Coolify on a Hetzner VPS
Installing Coolify on a Hetzner VPS is out of scope of this article, but if you’re interested, try following CJ’s video walkthrough on YouTube (although I decided to stick with Traefik and not switch to Caddy).
Watch the video walkthrough on YouTube
Creating a Simple .NET Project
I’m a fan of JetBrains Rider at home, although it’s Visual Studio out of choice at work, so jump over to JetBrains and grab yourself a free license for non-commercial use. I then make sure I’ve got the latest .NET SDKs installed (my last update here on my private laptop was .NET 6, so I installed .NET 8 then .NET 9). Then restart Rider and create a .NET 9 minimal API project (just make sure No Controllers is set) and choose to add Docker support. This article isn’t about creating the .NET project. You can just clone the repo if you want to run it yourself.
I wanted to test out some of my own NuGet packages that have .NET Standard support, since I haven’t done that for a while and chose the quieter UK tax UTR number validator and generator. I created two endpoints (one for each function) and then deleted the standard weather service, added the forwarded headers since I knew this was going behind a proxy. I also added the new Microsoft.Extensions.OpenApi and Scalar as a replacement for the now defunct Swashbuckle Swagger UI in .NET 9.
I then pushed that to my GitHub profile in a new repo. I don’t need to build this using GitHub actions. Coolify is going to do this for me in a buildpack.
Setting Up a New Coolify Project
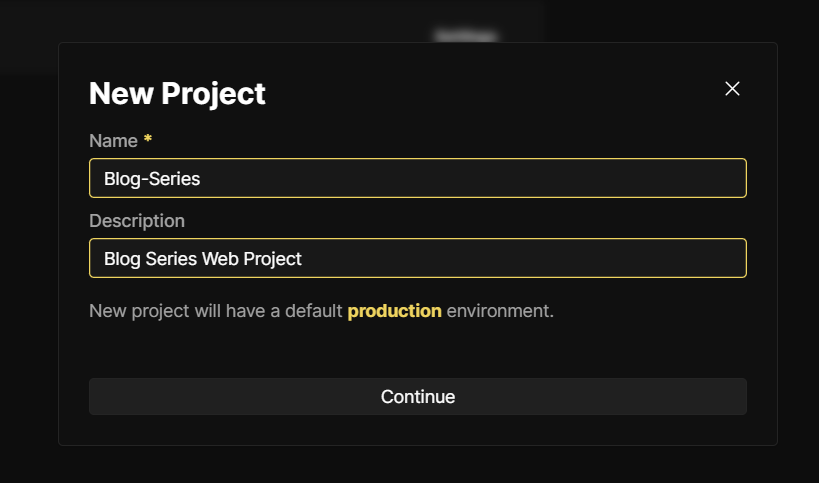
First step is to add a new project to Coolify. Don’t add the new resource to the default project, because it is easier to delete the project in the end than individual resources from that default project (same applies to Azure Resource Groups).

Now add the project details and create it.
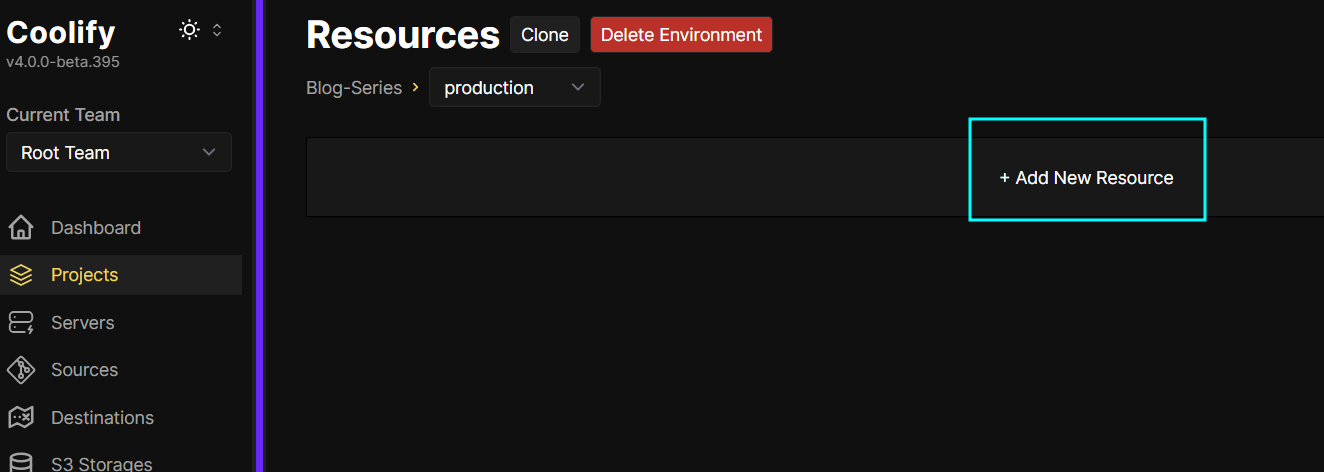
Adding a Resource
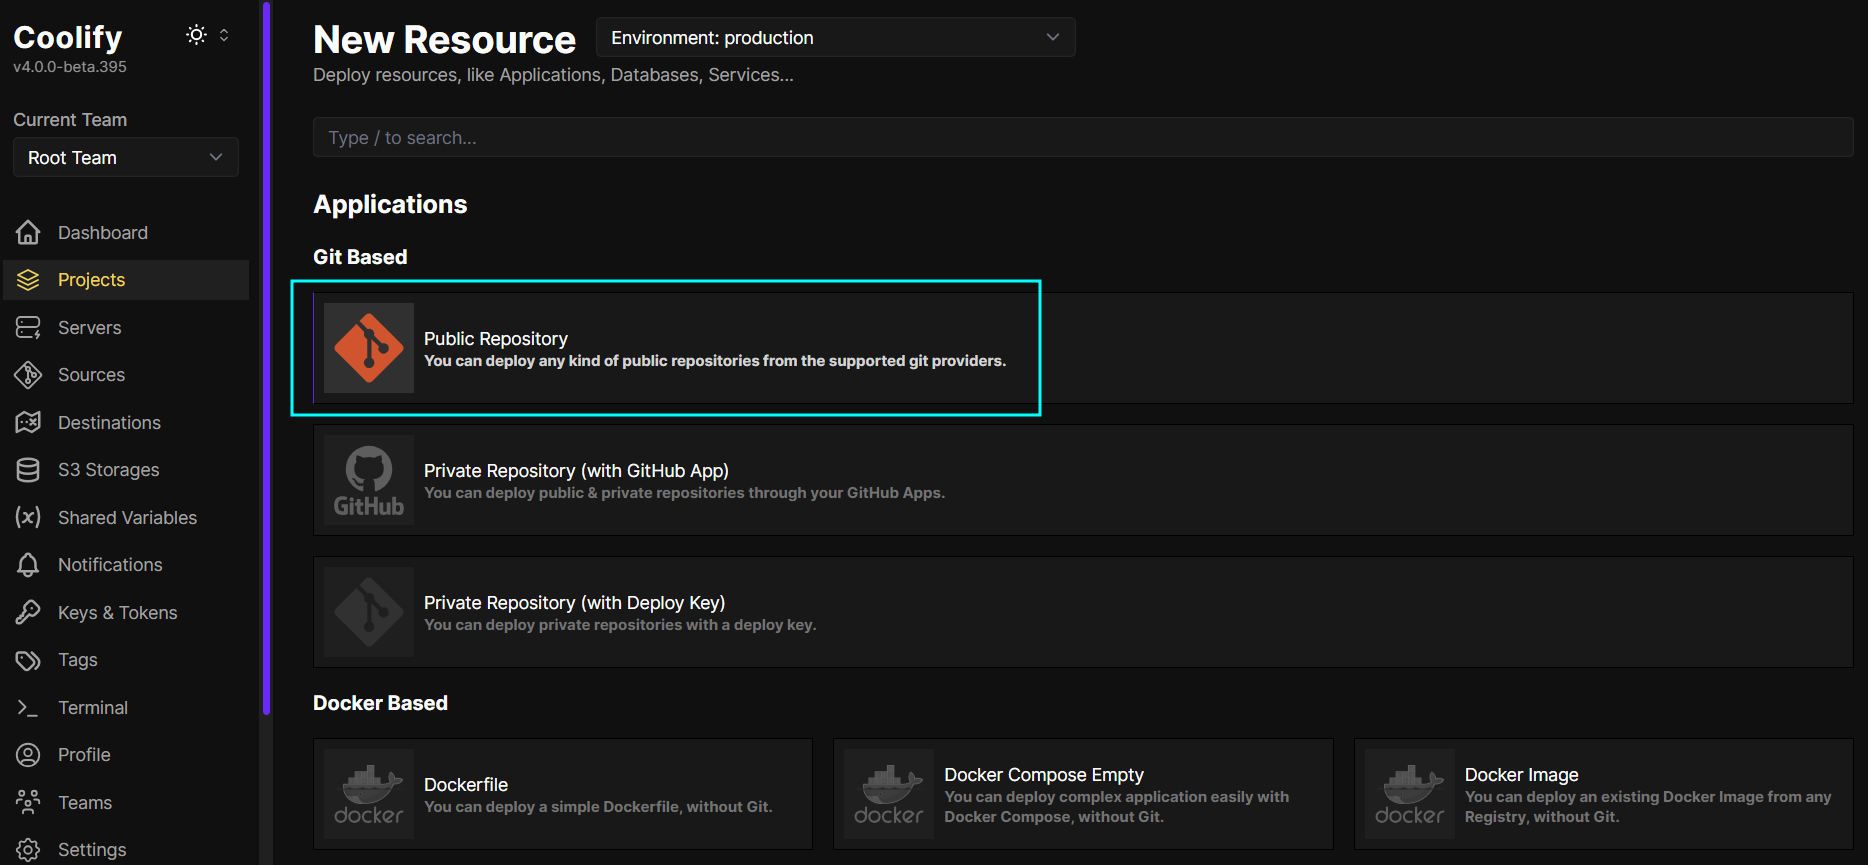
Next step is to add a resource. Coolify can use NixPacks as buildpacks, and it does have a .csproj build option, but I want to deploy the standard Dockerfile build. I plan on doing a follow-up post where I deploy a docker-compose as well.
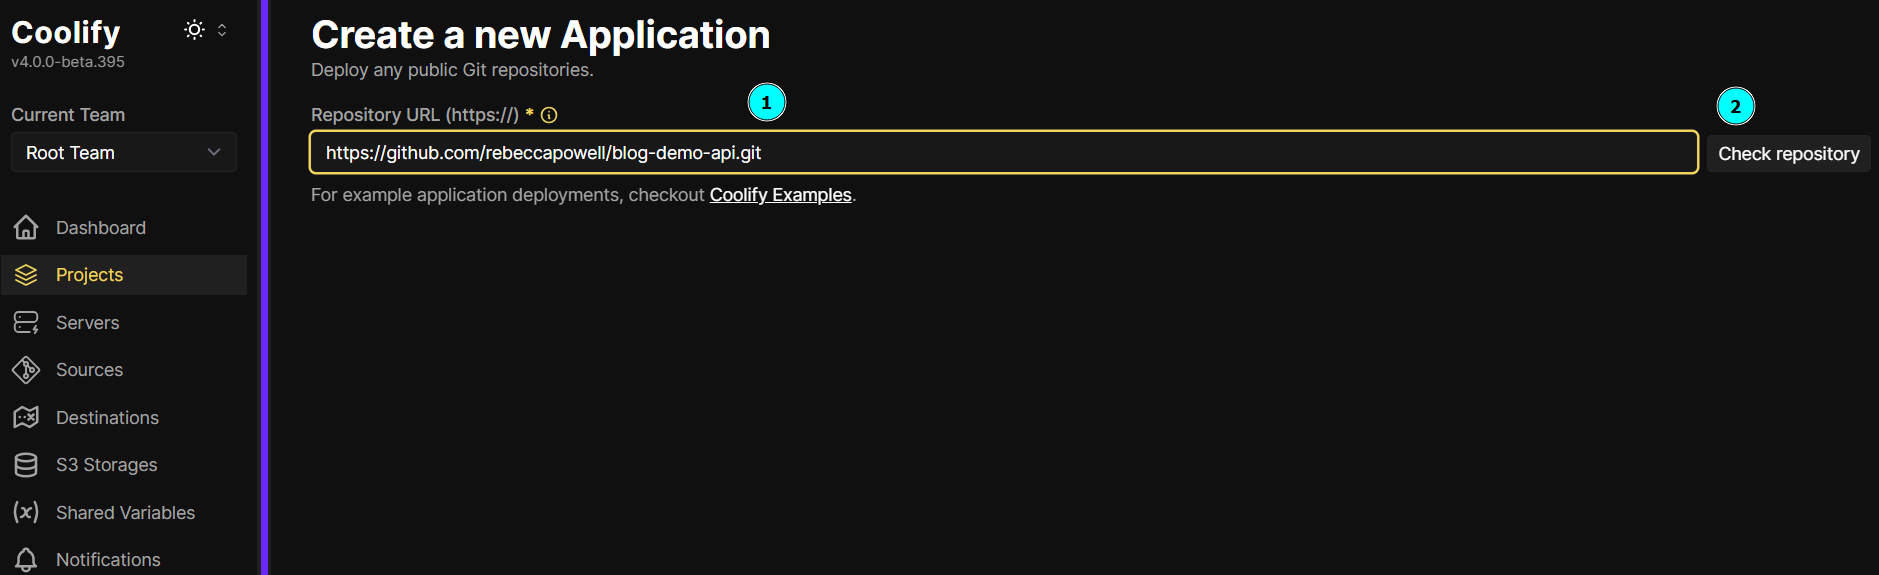
Now enter the resource details and in this case, we are going to access my public GitHub repository, so we grab the URL:
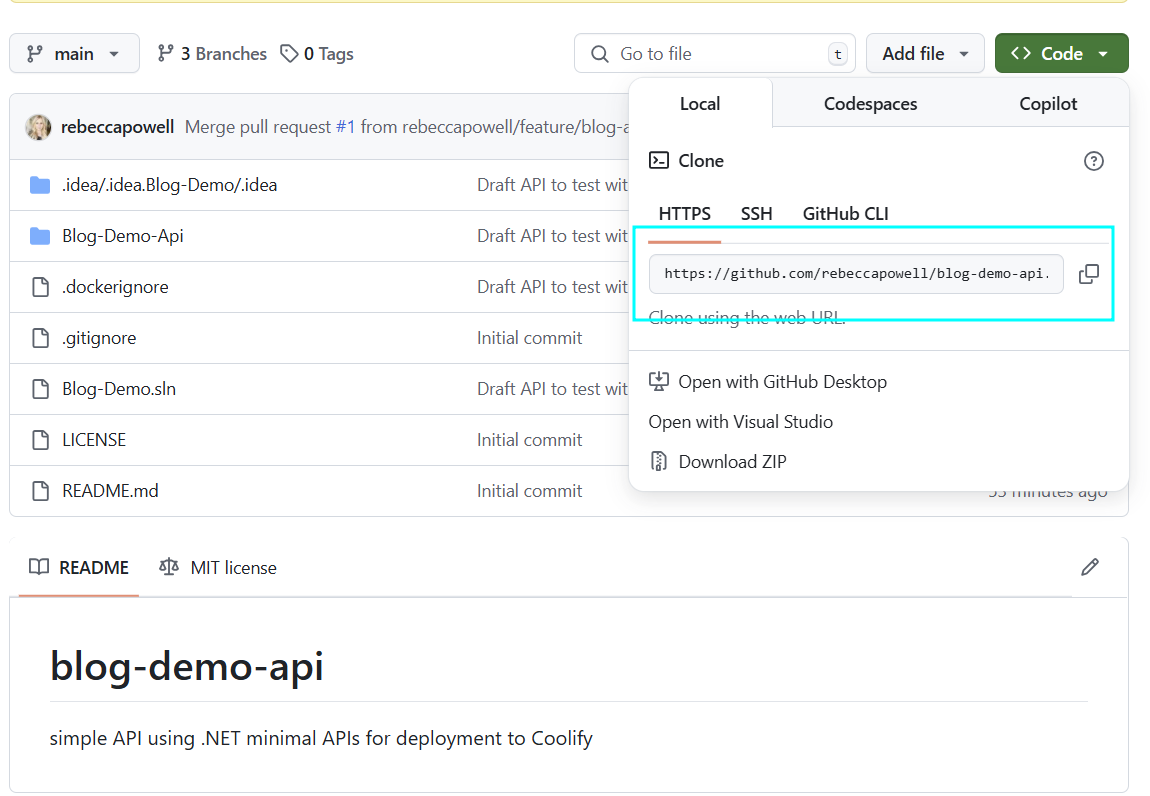
And paste it in the right place:
Now we enter the details of that repo [1] and click Check Repository [2]:
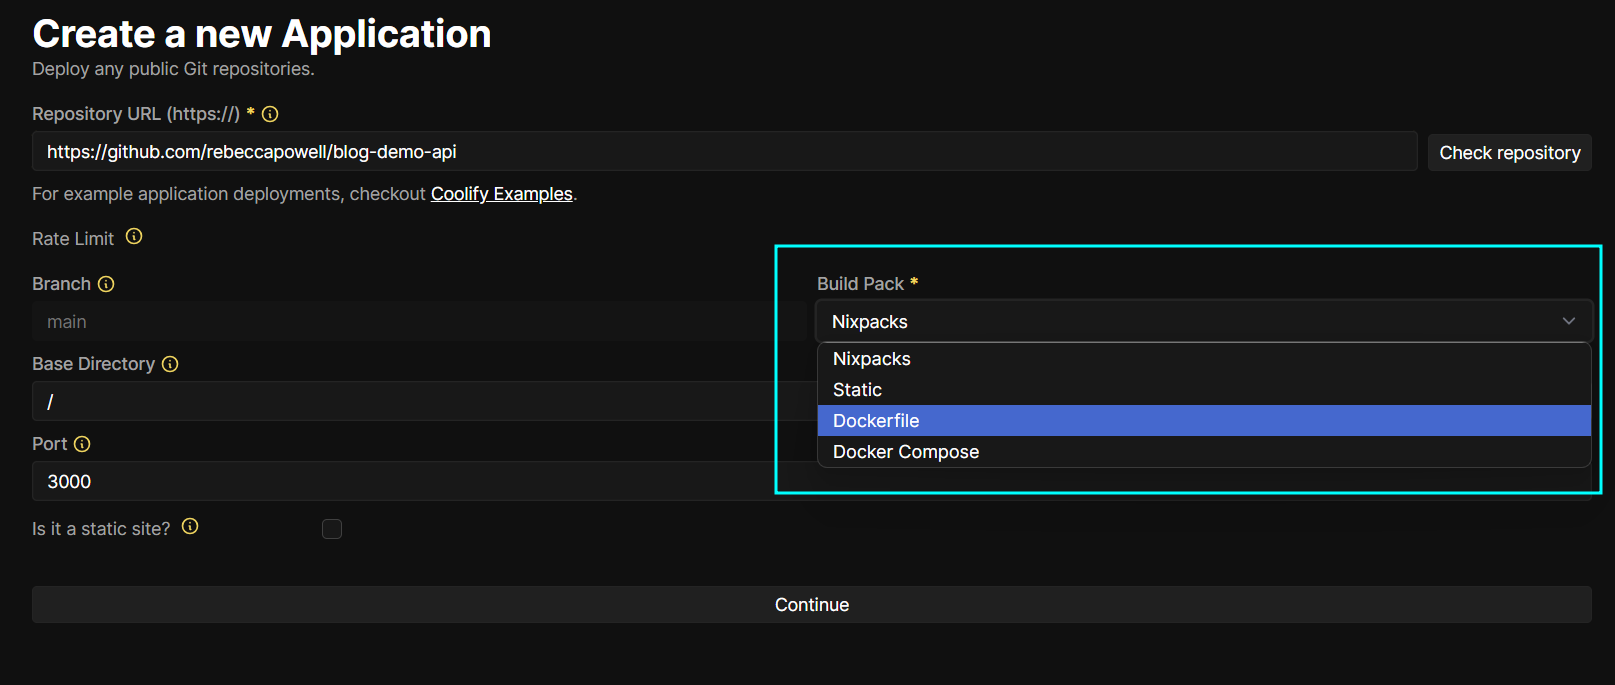
Coolify will now do its thing and set up the resource. Now choose the build method “Dockerfile”, since that’s the path we are taking here, but you can choose a docker-compose.yaml or a Nixpack targetting .csproj files. Note: currently Nixpacks don’t have support for .NET Aspire, but when they do it would be awesome. Go ahead and set the build method and clicking Continue:
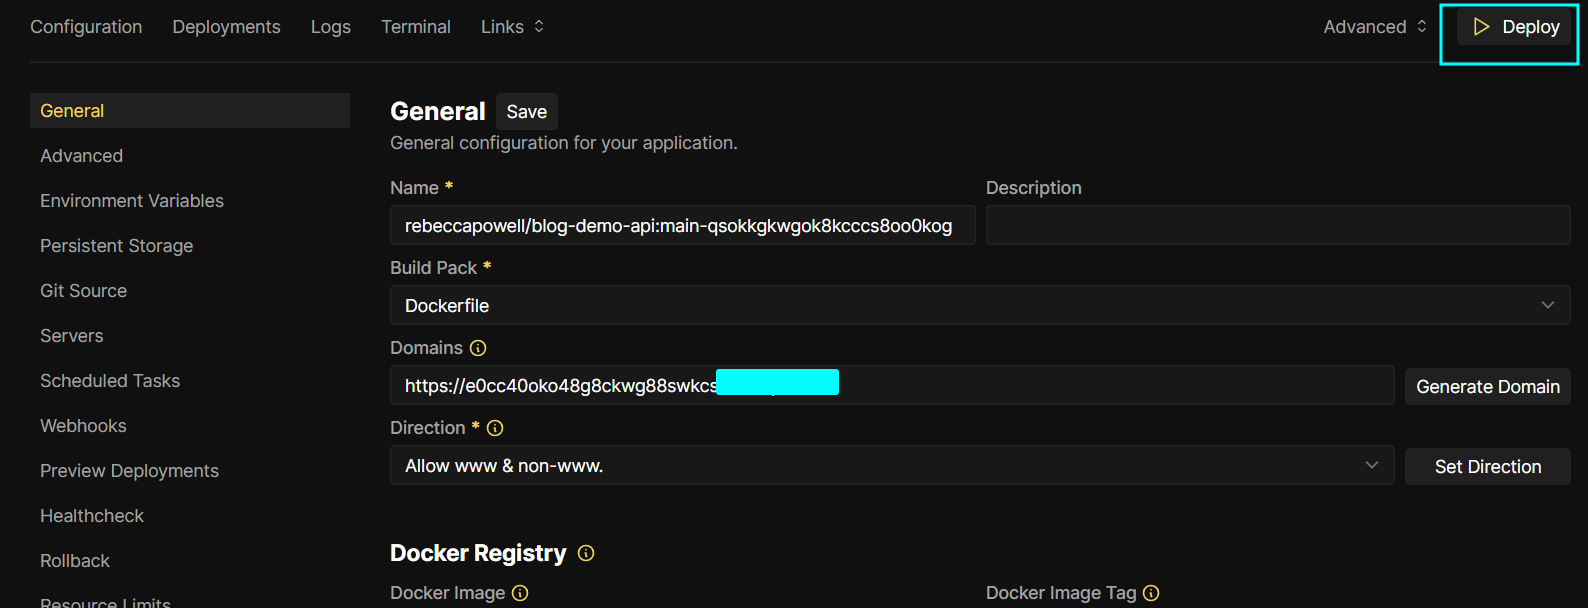
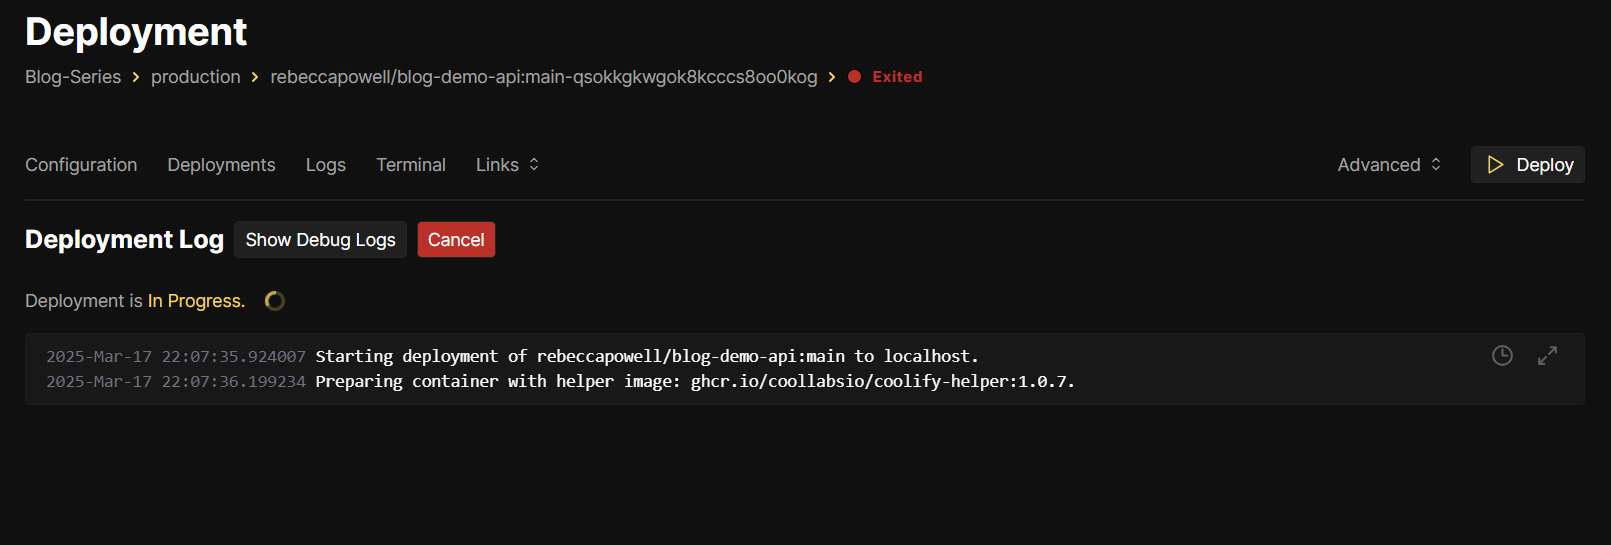
Then you can test it by deploying:
Unfortunately, it doesn’t work the first time, but everything is logged so we can work it out. No stress:
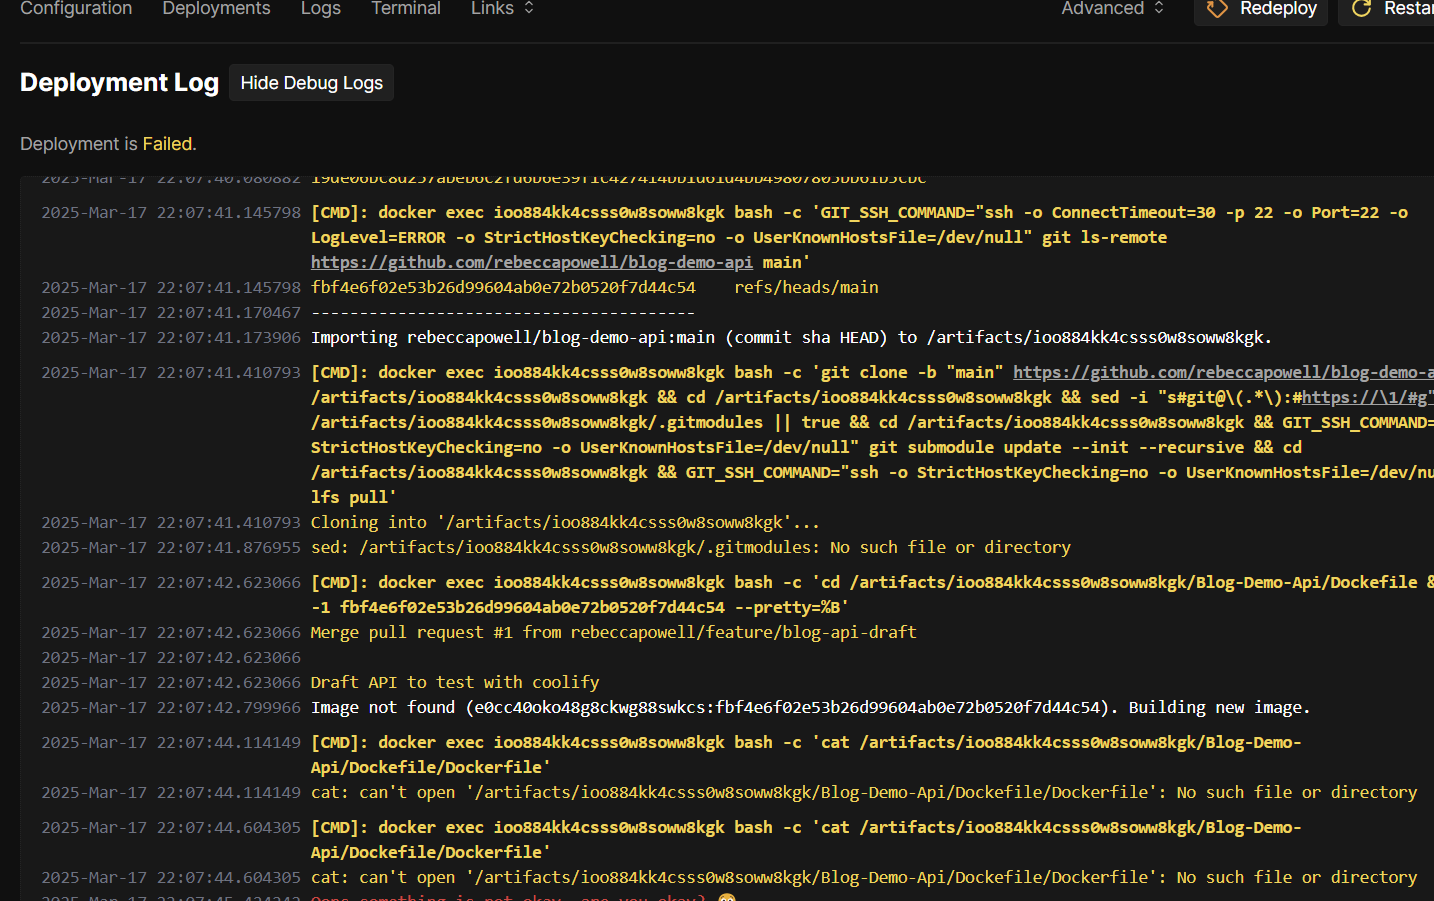
cat: can't open '/artifacts/ioo884kk4csss0w8soww8kgk/Blog-Demo-Api/Dockefile/Dockerfile': No such file or directoryLet’s Fix This!
Coolify expects by default that the Dockerfile is in the root folder of the repo. Microsoft, of course, creates solutions and projects in subfolders by default. So now we need to tweak things slightly.
First, we tweak the paths to the Dockerfile.
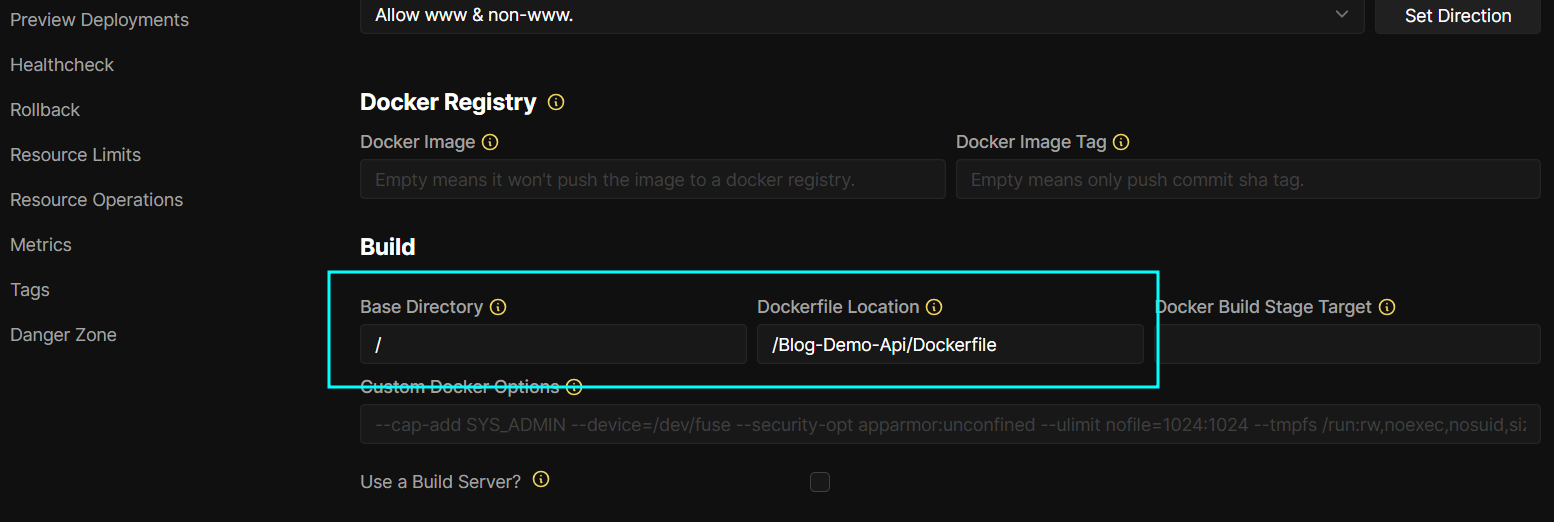
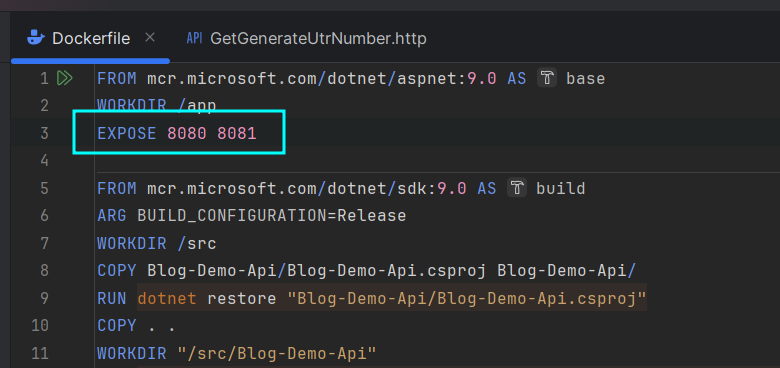
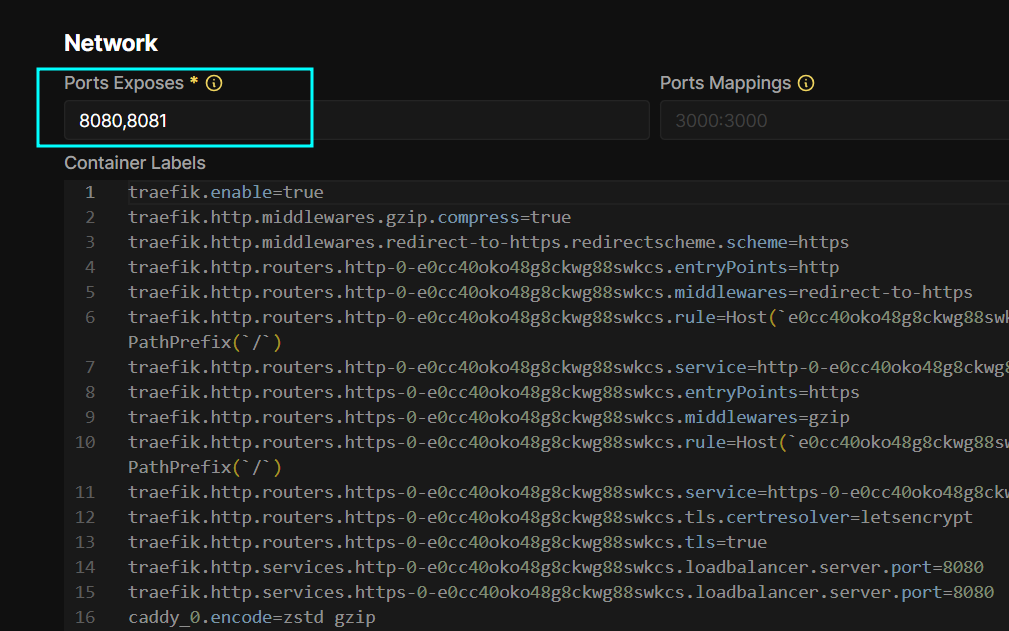
I took a quick scan through the rest of the settings and noticed that Coolify had defaulted the portmap to 3000:3000. That isn’t going to work for this app since those are not exposed. So we tweak the Traefik ports since the Dockerfile has defined them (internally) as 8080 and 8081, and we need them to match.
And the matched ports are listed like so:
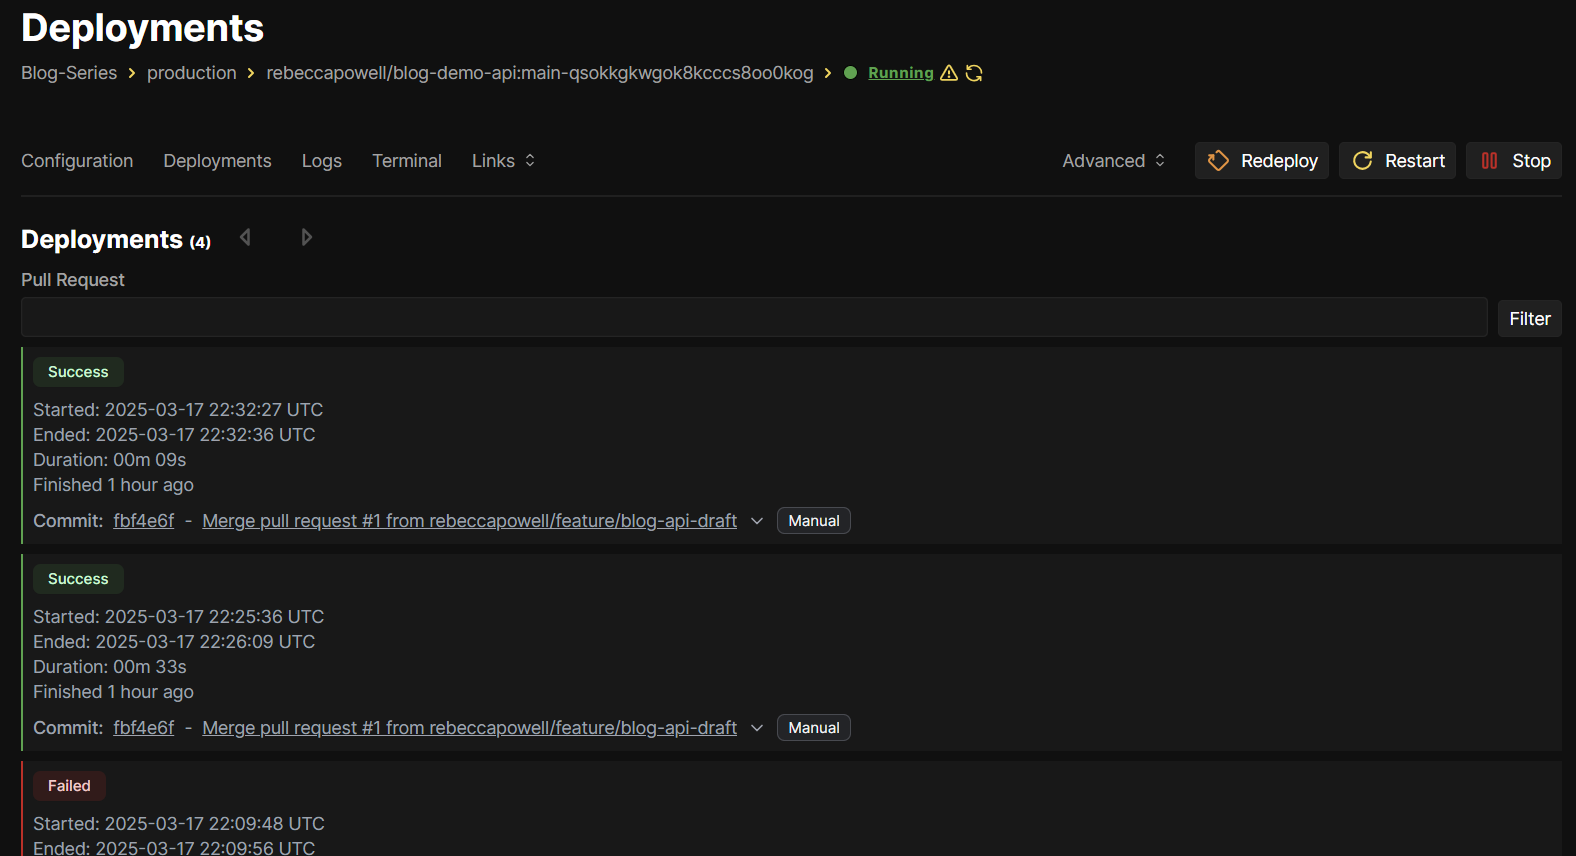
Deploying
Now we deploy again and cross our fingers:
Finally, we get a successful deployment:
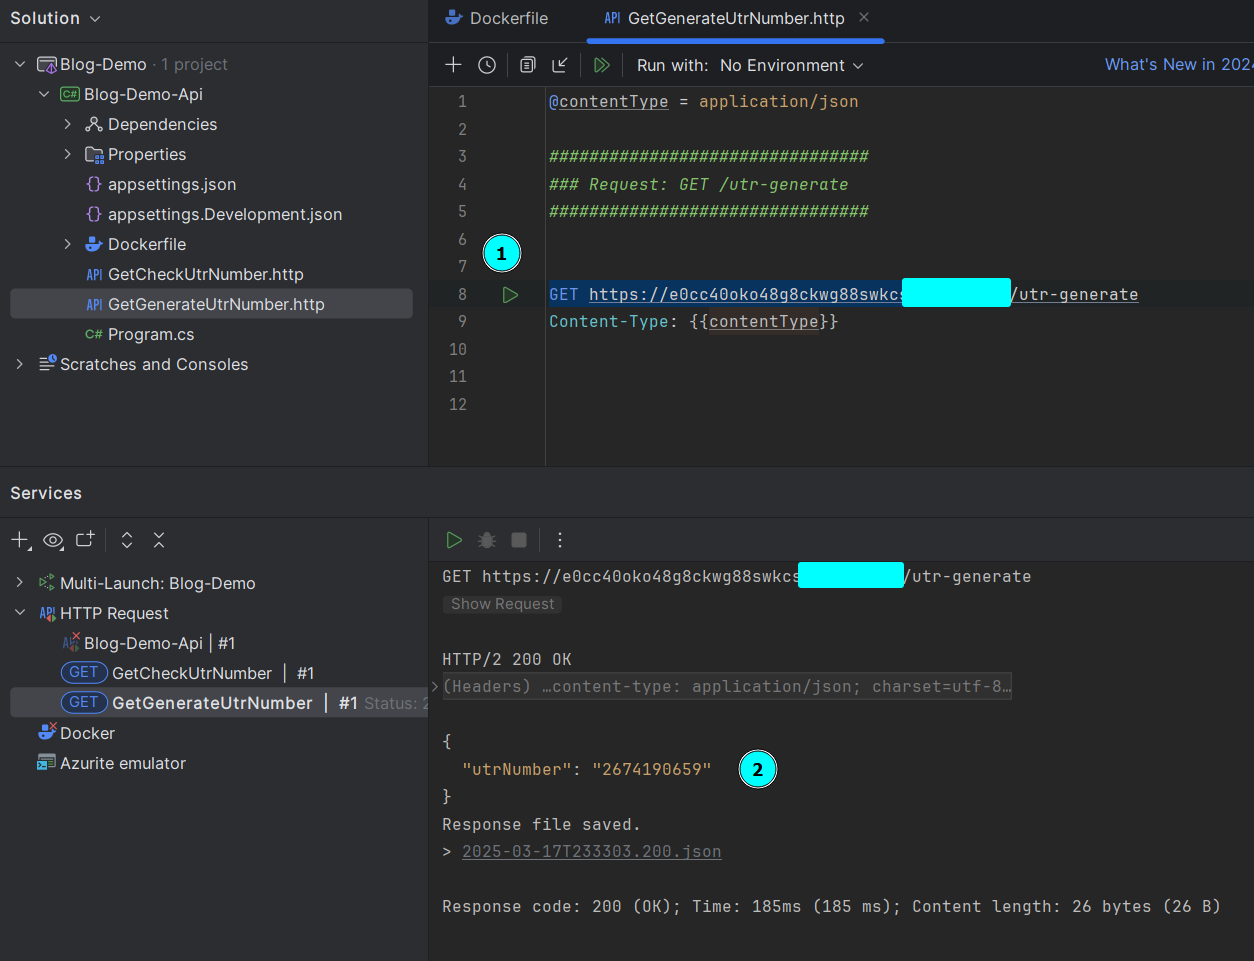
Let’s Test
For these small minimal APIs, I really like the .http file option to test quickly inside Rider (and VS).
You can also install a generator that generates the file for you given an Open API document. How cool is that! First, install the tool:
dotnet tool install --global httpgeneratorThen run your API locally and run:
httpgenerator http://localhost:5283/openapi/v1.jsonIt will create all of the .http files for you in the current directory the Terminal is running in.
Now you can just tweak you .http file to target your Coolify deployed API, and success!
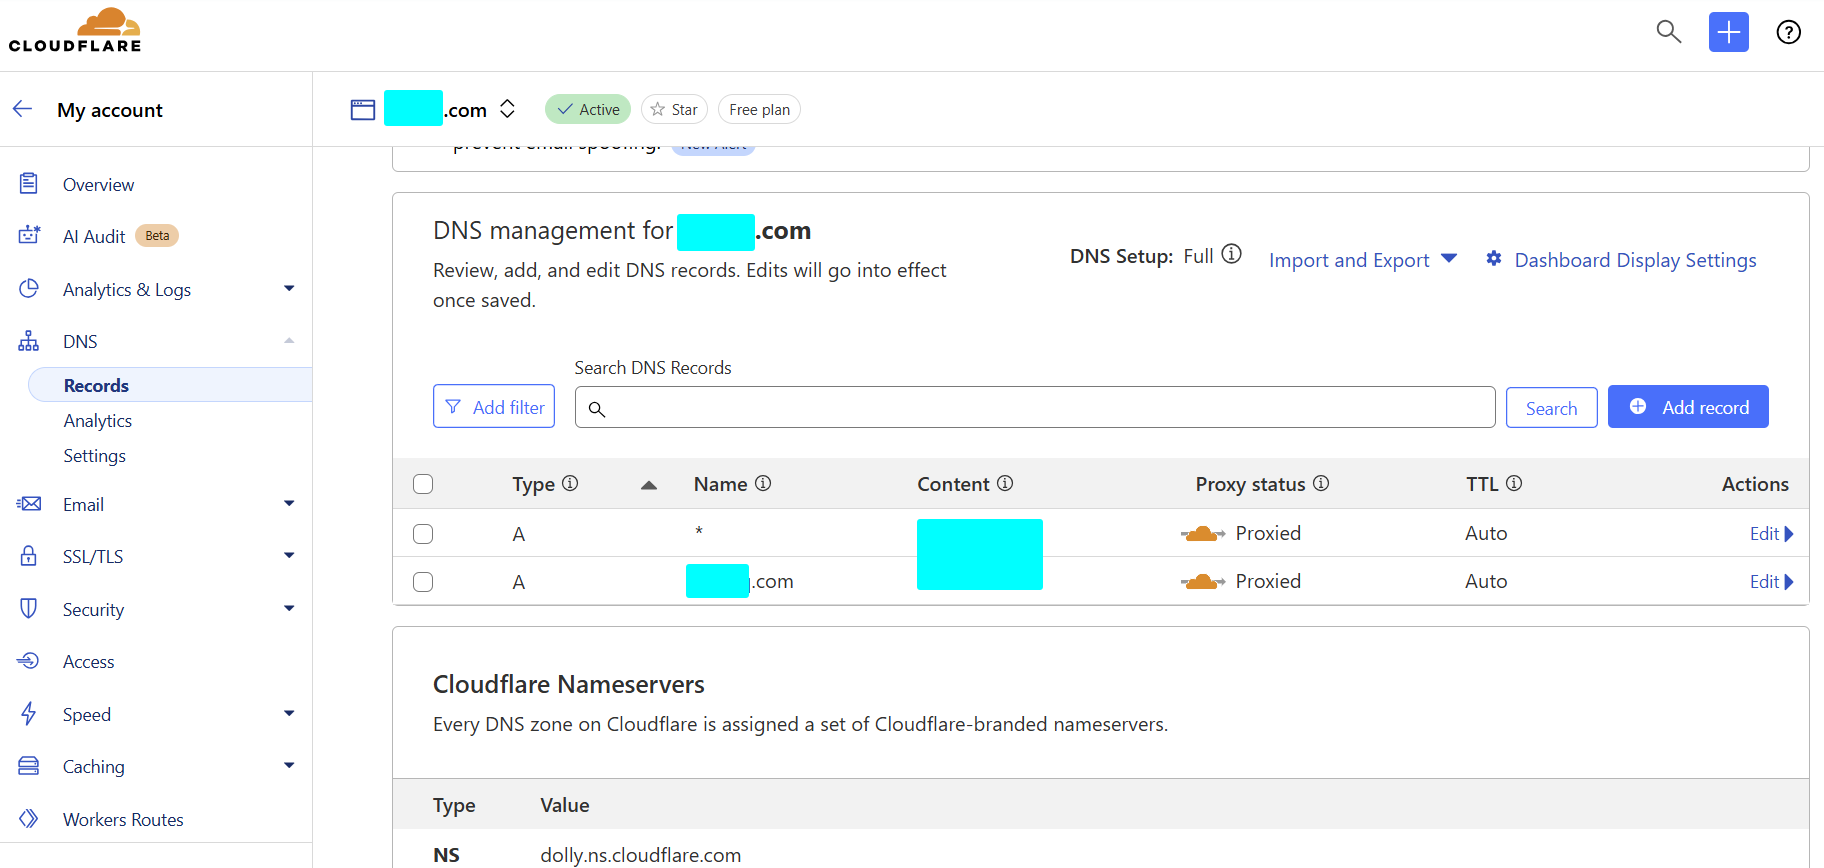
Note, I’m using Cloudflare to proxy my DNS. The settings for that are as follows:
I hope this guide helps you to have you own play around with Coolify and .NET!
If you’re interested in a follow up to this using docker-compose for a multi-app deployment then let me know in the comments. If you have feedback or questions then also feel free to drop me a comment.
Update…
My colleague David noticed some oddities around my configuration. I also wanted to add health checks (internal) so that Coolify can detect if the container is unhealthy.
The Dockerfile now exposes the following ports:
EXPOSE 4317 # application
EXPOSE 4318 # health checks
we then place the following in the final stages of the docker build pipelines:
# override the stadard 8080 and use a separate port for internal healthchecks
ENV ASPNETCORE_URLS=http://0.0.0.0:4317;http://0.0.0.0:4318

# coolify picks this up
HEALTHCHECK --interval=30s --timeout=10s --start-period=5s --retries=3 CMD curl --fail http://localhost:4318/healthz || exit

ENTRYPOINT ["dotnet", "Blog-Demo-Api.dll"]
Finally we alter the Progam.cs to support healthchecks and quite specifically make sure that the health checks endpoint only responds on port 4318:
var builder = WebApplication.CreateBuilder(args);

builder.Services.AddOpenApi();

// add this line
builder.Services.AddHealthChecks();

var app = builder.Build();

//......

// add the line
app.MapHealthChecks("/healthz").RequireHost("*:4318");

app.Run();